Free me website bnakar paise kaise kmaye 2023
How to create a website on Blogger A to Z guide
Do you also have your own website ? and share your knowledge with people? Do you want to convey your message to people through your writing skills by creating your own website?
So today we will discuss about how you can create your own website, that too for free.
Note - If you have any problem in creating it yourself then contact us, we can create any blogger website for you for ₹ 1500. Anyhow.
Contact me - Telegram
How to create a free website, step by steps
- First Blogspot.com has to create a website with the help of
- If possible, you have to add a domain to it.
- Your website has to be connected to Google Search Console
- Your website has to be connected to Google Analytics
- Your website has to be connected to Google Adsense
- You have to install a very good theme in your website.
Where to create the website?
In creating a website, the first thing that comes up is CMS, which means where you want to create your website, although there are many platforms to create and run a website, but Blogger and WordPress are the most popular platforms. On which not only lakhs but crores of people have created their websites and are running them for years.
How to create a website on blogger for free
Today we are going to tell you how you can create and publish your website on Google for free and by giving your desired knowledge in it, you can earn some money for yourself through Google, so in this article we will give you complete information about how. You have to create a website for free and how to run it and how you can earn from it, let us know.
To create a website for free, first of all you have to come to Blogger because it is the safest, secure and fast service of Google, through which you can create a website for yourself for free and host it with the help of Google, in this neither you have to pay for the domain. No need to pay nor any hosting charges
A website is created on Blogger absolutely for free, for this you do not need to pay a single penny, further we will tell you some times in which you may have to spend some money, if you want, you can leave them also.
Like = First of all you can take a custom domain because custom domain ranks very quickly. On Blogger we have worked in many websites and have found that the domain which comes from (www.yoursite.blogspot.com) ranks higher. Can't do it because it contains a label of Google which is present in its last URL like (www.yoursite.blogspot.com) so to avoid this we use custom domain like (www.yoursite. com) so that the identity of your site can be built-up that yes, this is what this website is about.
For website take .in domain or .com
Many people are worried about whether to take .com or .in domain, so listen brother, if you have little money then go for .com and if your income is less, if you are starting a new one then .in is very good for them. It will be good for the people of India who are not able to write in English and write their articles in Hindi, then .in domain is best for Hindi content writers, otherwise if you know English then you can rank your site in the cities of US and UK. If you want to get it done then you must take a dot com domain because it is better than a .in domain.
Steps to create a website on Blogger..
Let us understand briefly what you have to do to create a website.
- First of all you go to www.blogspot.com .
- After that create a new blog.
- After that choose a good name for your block.
- After choosing a good name of the block, choose a good display name for it which you will see on the home page.
- Then you have to enter the URL of your website, whatever you want, if the URL is not valid then you have to enter another URL similar to your website.
- Then if you click on Next, your new free blogger website will be ready.
And in this way you have created a free website with the help of Blogger, let us now know about its setup.
How to customize blogger website?
Website template plays the biggest role in customizing the website. If your theme is great then the people of your website will also be great.
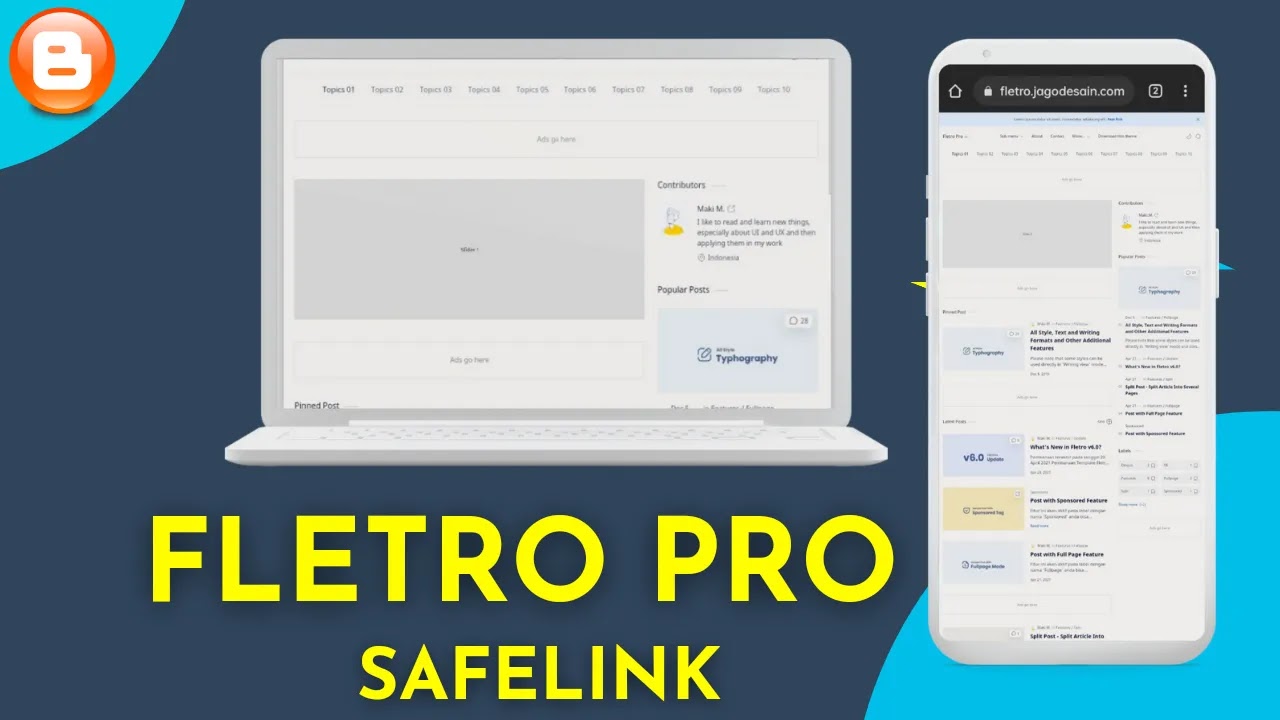
Below we have provided some themes, using which you can give a professional look to your blog, we have also given it with a demo link, so first see its demo, if you like it, you can also create it like that website. If you want, download that file. 👉 Download Themes
How to change the theme of blogger?
2 ways to change blogger theme: Either you can restore and change your theme by selecting the file or by clicking on the three dots and going to EDIT HTML, removing the entire code and then using the themes we have given you, use an HTML EDITOR. Open it in APP (trab editor, an writer free) and copy its entire code and come here, go to blogger and long press, select all, press one cut button or any other button, then the entire code will be removed from the keyboard. After removing the entire code of this theme, paste the previous and new code of Blogger in it by long press and then save it, this will change the look of your theme and website.If you change the theme through the restore option, then some codes of the previous theme also remain in the same due to which there is an error in the website, so whenever you make a change, do the edit from the HTML only, if still restore. If you are doing it from the internet, then see if there is no change on your website then that is also good, but in 70 percent of the cases, the effect on the website comes from the restore option, then you should use edit HTML only, copy the entire code and paste it here. Do it like this, the entire code behind your website gets removed and a new, completely fresh code comes in.
Connect website with Google products
How to add a website to Search Console
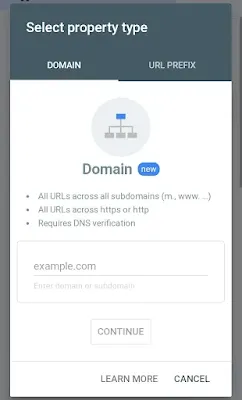
To add the URL of your website in the search console, you have to go to the search console and log in there with this Google account and to add the site, first of all create a property, click on create a new property. When you click, you have to choose the second option, URL PREFIX, then put the URL of your website in it and save it. In most of the cases, the blogger's website is approved without any proof, but if not. So you will be given 3,4 methods to approve there in which you have to choose the option with HTML TAG hint <meta.../> code , there you will get to copy a code, copy it and you will get your theme. You have to paste it below your <head> tag and then save your theme and then go to the search console and click to verify there too, if the code is installed in your theme. Your search console will verify in 4 seconds, and from there it will become a means to show all your URLs in Google.
How to add your website to Google analytics
After adding it to the search console, you have to add it to your website in Google Analytics so that you can know how many people are on your website, where they are from, which phone they are using, which browser they are using, whether they are male or female, for how long. And on which post you can find out all this with the help of Google Analytics. So let us know how to set it up.
First of all you have to open Google Analytics,
after that you have to create a property to add your website URL there. will be required
First of all enter the name of your account because you are creating an account,
then in your property you have to select your name, you can also keep your name or your site's name,
then you have to do next,
then you have to select your country, currency and timezone. Is.
The important thing is that you have to click on the advanced option there and also click on Create Universal Property ID and turn it on, this will create your ID which will work for the entire country and the whole world, for this it will be your It will ask for the URL of the site, give it the URL, start from www without https and create both G4 and Universal ID together, there you will get the selected one, click on the same, create both G4 and Ua, after that
you will get the next again. To do
want to know about your side business, he will ask how many people are there to run the website, then select the first one i.e. three to four people or your own, after that he will ask you about the category, then you can enter the category of your website in it. Enter the information about which your site is going to be created, after that correct all the options below so that it can see your site properly and provide you the data. After writing to everyone, you will not miss it. And from there you have to create, when you create, a long popup will open, in which you have to accept and continue the entire term and condition and in this way your Universal Property ID will be ready which will provide information about the entire traffic of your website. I will keep you updated.
Nothing will be done by just creating an account, there you will get a code, if you click on veiw tag instructions, you will get an HTML tag, you will have to paste it under the head of your blogger time and after saving it, save
it from here itself. The procedure is for G4 setup which is just new. If you want to follow the previous method then first you have to select UA ID from Universal ID in the property and there you will get a code (UA-12345678-9). Copy it and go to the settings of blogger and save it by entering this 10 digit code in the Google analytics code which will be found at no. 5. First again there is only one code for this. If you scroll down, there will be one code for that too. Now it is up to you to decide which property you want to see, then I would suggest you to choose UA only because it shows all the details of your property in clear and concise words. Paste only the UA code in your theme, the GA one is a bit critical, new users will not be able to understand it, so first put this UA code in the theme and save it, this code is something like this
Global site tag (gtag.js) - Google Analytics --> dir="ltr"><script async='async' src='https://www.googletagmanager.com/gtag/js?id=UA-xxxxxxxxxx-x'/ > <script> window.dataLayer = window.dataLayer || , function gtag(){dataLayer.push(arguments);} gtag('js', new Date()); dir="ltr"> gtag('config', 'UA-XXXXXXXXX-X'); </script>
Your code will be in XX,
this will connect your blocker to Google Analytics.
When it comes to the main thing that how will you earn from blogger, then for that you will have to add your website to Google AdSense, so let us know.
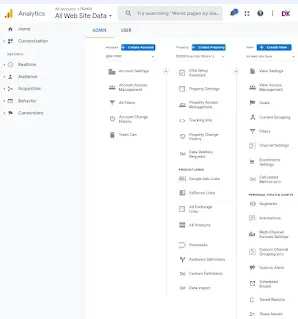 |
| If the photo is not visible clearly then click on the photo to see it. |
How to add website to Google Adsense?
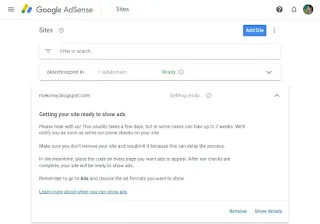
To add your website to AdSense, you have to create an AdSense account as you had created for analytics and there you will be asked for your URL while creating the account. There you have to provide the URL of your website and it will be requested for review. Have to send it so that Google can check it and find out whether this website is worthy of approval or not.
How to get AdSense profile on website quickly?
For this you can read this post or let me tell you that you must have three pages in your website, Contact Us, About Us and Privacy & Policy pages. You can generate these with the help of tools from Google and post whatever you want. It should be a good contact, it should not have copy content matching with others, it should be long and if it is good to read, it should have a press council, it should be an engaging one, which makes you feel like reading, many times Google rejects such a site which is good. They are not properly designed, meaning they keep roaming here and there, which I have to mount and see, only then can they read them properly. After that, I have written my short article. An article of at least 1000 words should be written at the time of getting approval on Blogger. But if you have used other ad networks on your website then Google will not approve you. There are many more factors.
Like low value content policy violation means posting some wrong thing on your blog.
After doing all this, you have to do something else to get your site ranked, such as visiting other blogs and writing posts or commenting, giving a link to your website in it so that it becomes a backlink to your website. You can also buy banklinks and get them made. If you are interested then it will be fine, you can ask any blogger and post it in his blog and by giving your gender in it, you can earn backlink, otherwise go to many websites like Pingler and ping (push) your website. Getting indexed quickly helps because Pingler tells Google that you also have a website located at this link.
By doing this, you have to write 20 to 25 posts and keep posting one post every day in 1000 words and then you have to send it to AdSense to get your site approved, mostly 30 days old sites are approved. It is done but for a long time we have seen that it takes 3 months, so you write the post 2 months in advance and then send it for approval and without writing good content, copy which is not already available on the net. Or write it in another way in his own words so that people can understand it clearly.
Conclution
Last word
In this post we will provided information about Free me website bnakar paise kaise kmaye 2023 , If you enjoy this post, kindly share it with your friends. For any queries, feel free to join our Telegram channel, where we share exclusive and informative content. Many valuable tips are exclusively available on our Telegram channel. Stay updated with your favorite source, DK Technozone.


